

DIARY
PAGE
ou le maquettisme au quotidien
Derničre mise ŕ jour datant du samedi 11 octobre 2003
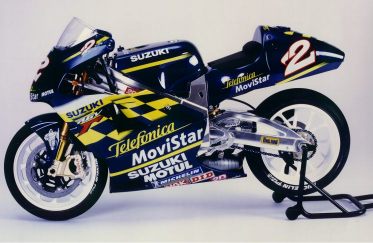
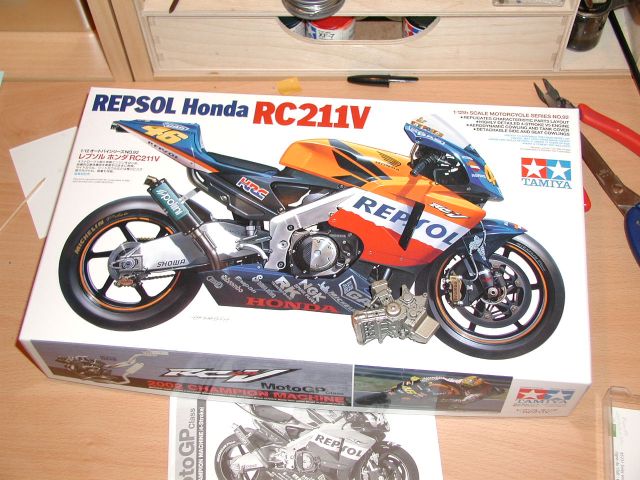
TAMIYA RC211V 2002
Many many thanks to Riccardo, an italian friend for the translation.
Jeudi 20 Mars
Cette page a pour objet d'exposer étape par
étape le montage d'un kit. Comme je viens de recevoir la sublime RC211V de chez TAMIYA,
je commence par elle. De toutes les façons comme il n'y a pas de nouvelle F1 ou voitures
en ce moment, ça tombe bien!
The objective of this page is to explain the step by step assembly of a model
kit.
As it happens that I received the wonderful Tamiya RC211V, I will start with
that kit.
Anyway, as I have no new F1 cars or other cars at this moment, this comes well!
Je commence par la partie moteur car c'est
dans l'ordre de la notice et j'hésite sur la décoration ŕ donner ŕ cette RC211V (voir
plus loin).
I begin from the motor parts as reported in the building instructions, but I am
not sure on wich decoration to chose for this RC211V (see further below).
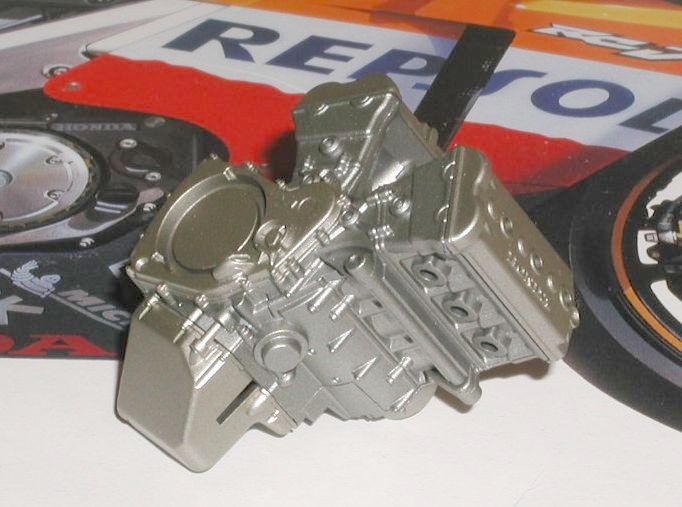
La notice recommande de peindre le moteur en
XF56 gris acier et les pičces latérales avec un mélange XF56+X31 Or titanium. Le
montage commence donc mal puisque ces teintes sont bien trop claires par rapport ŕ la
réalité (voir photo de la page RC211V). Il va donc falloir
recommencer!!
The building instructions recommends to paint the motor in XF56 (steel) while
the side parts are to be painted in a mix of XF56+X31 or titanium.
The assembling begins badly, as these colors are way too bright in comparison to
the real bike (see photos in RC211V page).
It is necessary to start over again!!!
Quant ŕ la déco j'hésite. Il y a bien sur
la déco REPSOL de la boîte mais en regardant le site MAX MOTO MODELING je constate que la déco pose
quelques petits soucis. En outre je vais recevoir la planche de décalques pour faire la
déco WEST du team PONS 2002. Mais surtout le męme team PONS vient de changer ses
couleurs pour 2003 avec l'arrivée de CAMEL
As for the decals, I am still not sure.
The REPSOL decal from the box is good, but when I look at MAX MOTO MODELING
web site, I can see that the decal have some problems.
Further more I will receive the WEST decal sheet, to build a team PONS 2002
bike.
Especially the same team PONS has just changed its colors for 2003 with
the arrival of CAMEL.
Samedi 22 Mars
Pour commencer j'ai pris la
décision de faire la déco REPSOl en premier. Car la planche de décalque va ętre assez longue a réaliser et j'ai
envie de faire la RC211V tout de suite. Ensuite l'arričre de la RC2003 est trčs
différent de l'arričre 2002. Ce qui impose des retouches en profondeur, bref du temps.
To begin I took the decision to do the REPSOL livery first.
Because the decal sheet will be rather long to be available, and I want to do
the RC211V right now.
Even more the back of the RCV
2003 is very different from the back of RCV
2002.
This
mean deep modifications and a lot of times
Décision est donc prise de faire la version
Pons 2003 dčs que j'aurais une RC211 supplémentaire c'est ŕ dire courant avril.
So I decided to build team Pons 2003 version when I get the next RC211V,
probably this April.
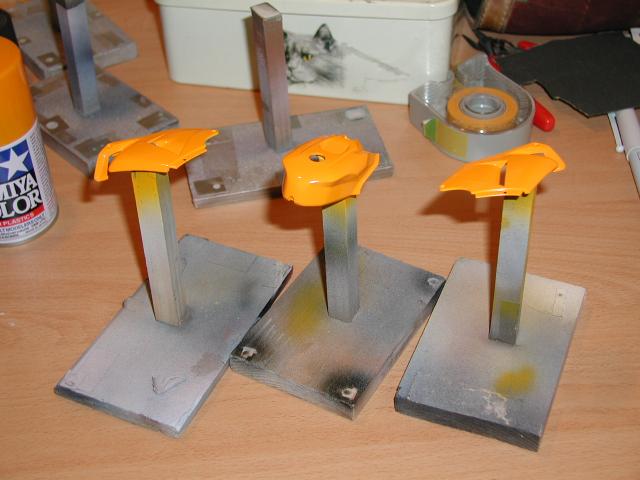
Le Week-end a été productif: je me suis
attaqué ŕ la carrosserie.
This week end was productive: I started the body.
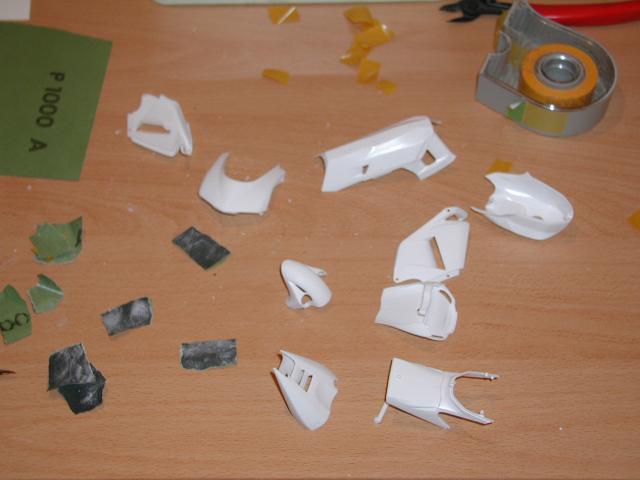
Je commence donc la
réalisation de la carrosserie par le collage des pičces et le ponçage des joints de
collage ou de moulage.
I begin the realization of the body cutting the body parts off the sprue and
cleaning any mark.
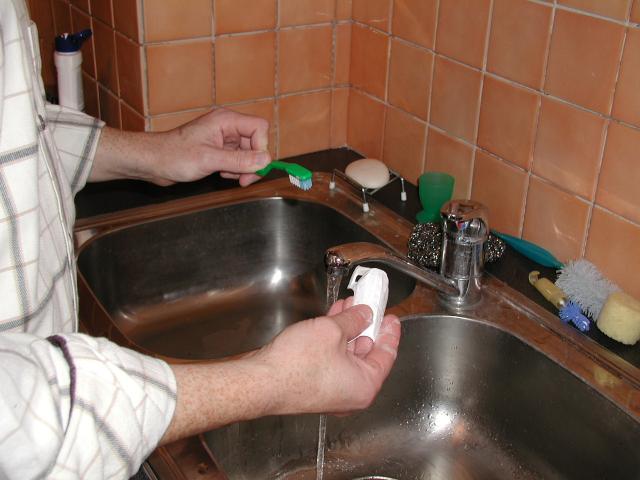
Puis les pičces sont
soigneusement dégraissées avec de l'eau tičde et du liquide vaisselle (Palmolive). Vous
remarquerez que les joints de la faďence de la cuisine n'étaient pas fait. C'est chose
faite depuis hier!
The pieces are carefully washed with mild warm water and liquid soap
(Palmolive).
You can notice the kitchen tile gaps are not
made.
This
was done since yesterday!
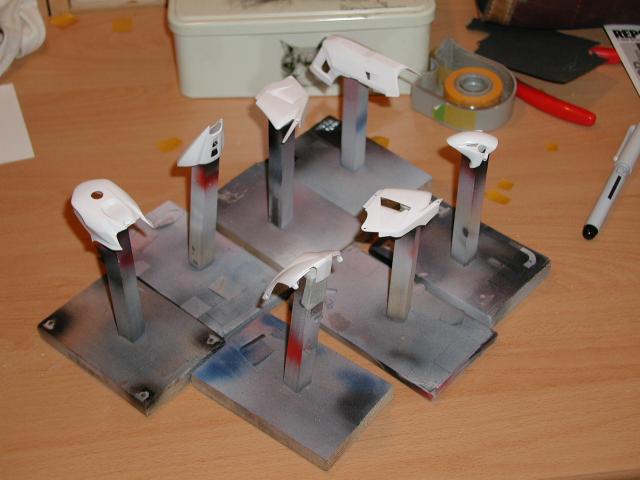
Une fois bien séches, les
pičces sont fixées sur des supports en bois avec de l'adhésif double-face.
Once they are well dry, the pieces are stuck with doble sided tape to a wood
support.
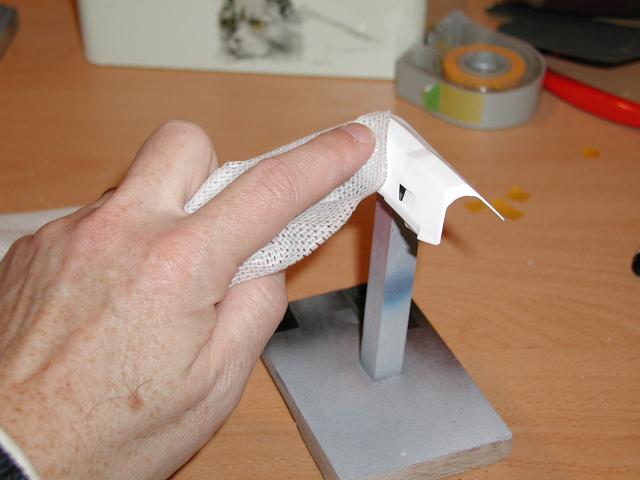
Puis je passe un chiffon anti-poussičre sur les pičces.
Next
I clean the parts with a lint-free cloth.
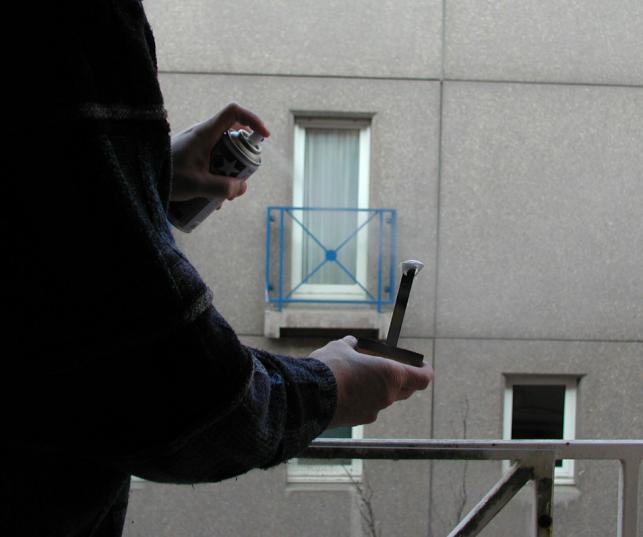
Avant de passer une couche
d'appręt Tamiya Surface Prime Blanc. Remarquez que la peinture est faite en extérieur,
et la distance séparant la pičce du spray.
Before spraying a white Tamiya Surface Primer coat.
Note that paint is sprayed outdoor, notice also spraying distance from the part.
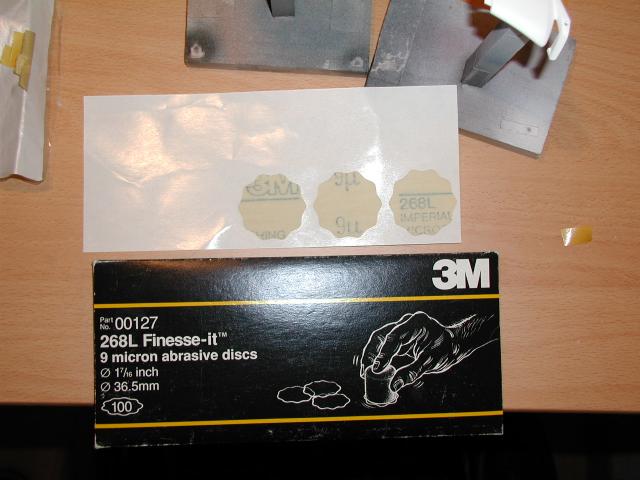
Qui dit extérieur dit
poussičre. J'utilise donc les pastilles de finition 9microns finesse-it pour les
éliminer de l'appręt.
If
dust gets on the surface.
I use 9microns finesse-it finishing discs to remove dust from the basecoat.

Pour les teintes de la RC211V,
j'ai utilisé les bombes Tamiya. La TS56 pour l'orange. Comme je suis nul lorsqu'il s'agit
de peindre ŕ la bombe je transfčre un peu de peinture dans le godet de l'aérographe.
Bien entendu le godet et l'aéro sont recouvert d'un chiffon pendant l'opération qui se
déroule aussi en extérieur.
To paint the RC211V, I will use Tamiya spray color.
Orange is TS56.
As usual when I paint, I spray some color from the can to the airbrush glass
jar.
During this operation, both the spray can and the jar are covered with a rag,
and everything is done outdoor.
La peinture du godet est
diluée ŕ 30% avec du diluant de nettoyage polyuréthanne. Attention quand la peinture
est juste sortie de la bombe; le godet est trés froid et la peinture est trés réactive
(bouillonnement) lorqu'on y plonge le tube de l'aéro qui est ŕ température ambiante. Ce
phénoméne s'arręte lorsque l'équilibre thermique est atteint.
The paint in the jar is thinned with 30% of polyurethane cleaning thinner.
Take care when the paint is just sprayed off the can: the jar is very cold and
the paint is very reactive when I plug the jar to the
airbrush, which is at room temperature.
This
stops when a thermal balance is attained.
Dimanche 23 Mars
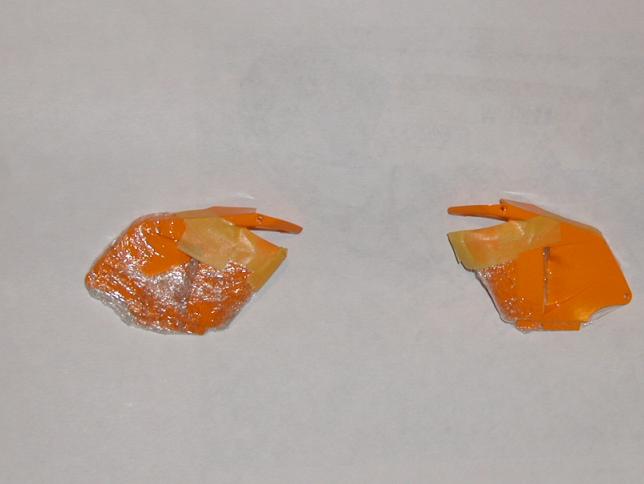
Dimanche, aprés avoir
fait le
carrelage de la cuisine, rempli ma déclaration d'impôt et laissé la peinture sécher ŕ
coeur pendant la nuit, j'ai fait le masquage des flancs avec un peu de papier cellophanne
et d'adhésif Tamiya.
Sunday, after having cleaned the kitchen tiled floor, filled in my tax
declaration and left the paint dry overnight, I masked the side parts
with some self clinging film and Tamiya masking liquid.
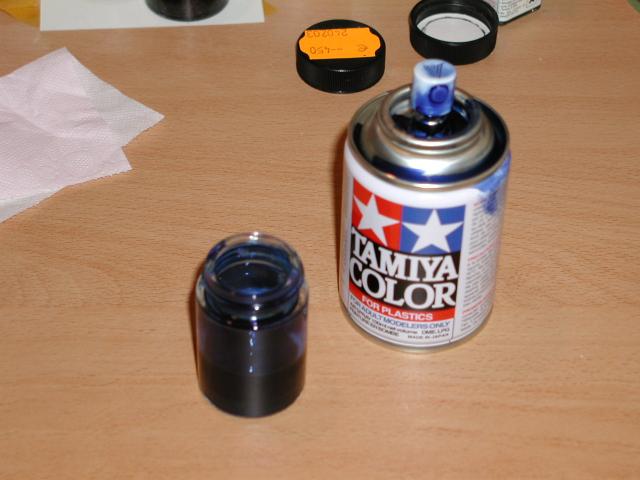
Pour le bleu j'utilise la bombe
TS56 qui est celle de la NSR500 99 (Deep Metalic Blue).
For
the blue paint, I will use Tamiya spray TS56 (Deep Metalic Blue), which is the
same color of the '99 NSR500.
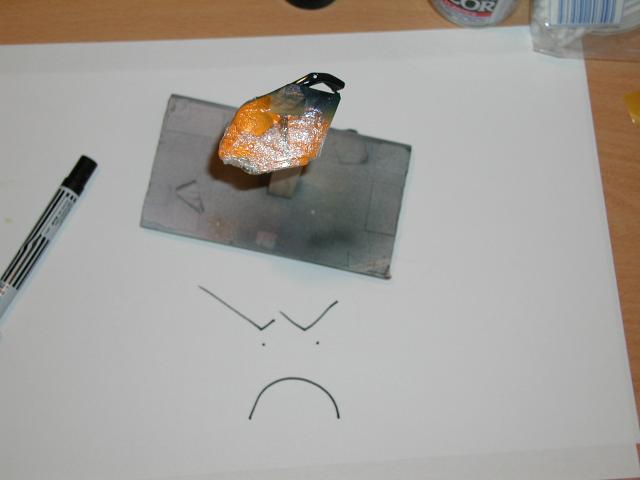
MAUVAIS CHOIX !!!
Contrairement ŕ ce qu'indiquait la notice, il ne fallait pas peindre le bleu directement
sur l'orange, car la teinte est bien trop verte! Je suis un peu con aussi car je savais
pertinament que le bleu TS53 est trčs translucide. Il faut donc passer un appręt sur
l'orange.
BAD
CHOICE!!!
Contrary to what the building instruction says, you must not paint blue straight
over orange, as the blue will result greenish!!
I am a fool, as I know well that blue TS53 is a very transparent paint.
So, I need to prime over orange.
C'est chose faite en passant un
voile d'argent titanium X32 Tamiya.
This is done spraying a coat of X32 Tamiya titanium silver.