| |
----TUTORIAL 5---
Adding SkyBox
environnment
You will Need The NemoX engine Get it Here
download the Visual Basic Source code here
we'll use the same BaseCode as the Previous tutorial.
Summary
1.
New Objects
Declaration and initialization
2.
Setting Up our SkyBox
Environnment
3.
Game Loop Modification
1. New Objects
Declaration and initialization
'The Main One is The
NemoX renderer
Dim Nemo As NemoX
'we're gonna use a Nemo class for rendering a mesh or
polygons
'we use cNemo_Mesh class
Dim Mesh As cNemo_Mesh
'we will need a quick acces to very important and
useful functions
Dim Tool As
cNemo_Tools
'====NEW OBJECT====For our Skybox
Dim Sky As
cNemo_SkyBox
Now in our
initialization code we Add a new initializer code provided by NemoX engine
|
'we will used
that sub for the engine initialization
Sub InitEngine()
'first thing allocate memory for the main Object
Set Nemo = New Nemo
Set Tool = New
cNemo_Tools
NEW CODE HERE NOW LET'S THE USER KNOWS
'we use this method
'now we allow the user to choose options
'32/16 bit backbuffer
If Not (Nemo.INIT_ShowDeviceDLG(Form1.hWnd))
Then
End 'terminate here
if error
End If
'set the back clearcolor
Nemo.BackBuffer_ClearCOLOR = &HFFC0C0C0
'set some parameters
Nemo.Set_ViewFrustum 1, 15000, 3.14 / 4
Nemo.Set_light True
'set our camera
Nemo.Camera_set_EYE Tool.Vector(0, 15, 0)
End Sub
|
2.Setting Up our SkyBox
Environnment
Now we add the skybox
initialization code at our Builgeometry sub routine
|
'we build our
mesh here
Sub BuilGeometry()
'allocate memory
for our meshbuilder
Set Mesh =
New cNemo_Mesh
'adding a plane
surface for a simple floor$
'first off very
important we pass a texture to the meshbuilder
Mesh.Add_Texture (App.Path +
"\Relief_8.jpg")
Mesh.Add_WallFloor Tool.Vector(-5000,
-1, -5000), Tool.Vector(5000, -1, 5000), 10, 10, 0
Mesh.Add_Light 254, 251, 0,
800, Tool.Vector(500, 500, 0), 50
'then we build
our mesh
Mesh.BuilMesh
'============NEW
CODE========
' setting up the
skybox environnment
'===========================
'allocate memory
for the sky object
Set Sky =
New cNemo_SkyBox
'initialize our
sky dimensions
Sky.Init_SkyBox 10, 10, 10
'we add each sky
texture part here
Sky.Add_SkyBOX NEMO_SKY_LEFT,
App.Path + "\rockyvalley\rockyvalley_lf.jpg"
Sky.Add_SkyBOX NEMO_SKY_RIGHT,
App.Path + "\rockyvalley\rockyvalley_rt.jpg"
Sky.Add_SkyBOX NEMO_SKY_BACK,
App.Path + "\rockyvalley\rockyvalley_bk.jpg"
Sky.Add_SkyBOX NEMO_SKY_FRONT,
App.Path + "\rockyvalley\rockyvalley_ft.jpg"
Sky.Add_SkyBOX NEMO_SKY_DOWN,
App.Path + "\rockyvalley\rockyvalley_dn.jpg"
Sky.Add_SkyBOX NEMO_SKY_TOP,
App.Path + "\rockyvalley\rockyvalley_up.jpg"
'we rescale the
sky here to fit our scene
'environnement
Sky.Set_Scale 8500, 8500, 8500
End Sub
|
3.Game Loop Modification
|
'this sub is
the main loop for a game or 3d apllication
Sub gameLoop()
'loop untill player press 'ESCAPE'
Do
'=====Keyboard handler can be added here
Call GetKey 'go to the previous
tutorial for details
DoEvents
'start the 3d renderer
Nemo.Begin3D
'===============ADD game rendering mrthod here
'===NEW CODE===
'render the sky
Sky.RenderSky
'===END NEW CODE==
'draw our floor
Mesh.Render
'show the FPS at pixel(5,10) color White
Nemo.Draw_Text "FPS:" + Str(Nemo.Framesperseconde), 5, 10,
&HFFFF0000
Nemo.End3D
'end the 3d renderer
'check the player keyPressed
Loop Until Nemo.Get_KeyPress(NEMO_KEY_ESCAPE)
Call EndGame 'go to the previous
tutorial for details
End Sub |
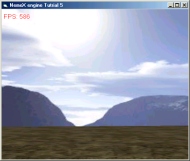
Here is a screenshot for our tutorial project

download the Visual Basic Source code here
See you in the next Tutorial.....sincerly Polaris..Don't forget Any Bugs
detected mailMe
The PreviousTutorial 4 :Drawing
Polygons
The Next Tutorial 6 :Adding
LensFlare and Glow Effect |
|